Companies and Individual Providers
Manage service provider records, customer-facing contacts, default assignments and company verification without confusing them with customer accounts or payout details.

The Firms section stores the service providers for your hosting business: the company, registered business or individual that provides services to your customers. It is not a list of customer companies or user accounts.
If you have completed the setup wizard, your first provider already exists. Open that record and add details rather than creating it again.
The screenshots use the same fictional Northline GPS service and Northline Telematics provider as the setup chapter. Contacts, addresses and registration numbers are demonstration data; enter your own valid details in your panel.
Find and open a provider
Open Firms in the hosting panel's top menu. The default provider appears first with a Default company label. Each list entry shows the name, registration number, contact person, email and address. Company entries also show their verification status.
Click the provider's name or choose Action → Edit. This opens the full record, which has more fields than the short setup wizard form.
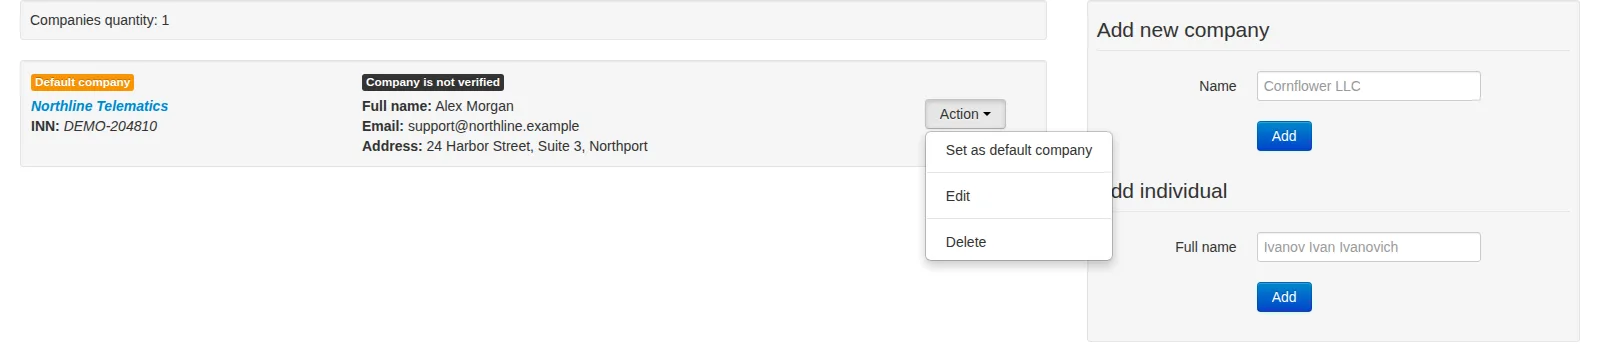
The provider created by the wizard is already listed. Use Action to open it for editing.
Add another provider
Create another record when a different organization or individual actually provides the services. A new pricing plan or another website operated by the same provider does not require a separate company record.
There are two forms on the right of the list:
- Add new company: enter the company name and click Add.
- Add individual: enter the person's full name and click Add.
The first button only opens the detailed form. The record is saved after you complete that form and click Create. Choose the appropriate provider type; you do not need to create both.
A company requires a name and tax or registration number. An individual requires a full name and tax or registration number. In this older form the number field is labelled INN. If the panel says the number is already registered, check your existing records and contact support. Do not enter a random number to get past the message.
The provider type is selected when creating the record. The normal edit form does not offer a company/individual switch.
Company details
The main form contains the company name, head of the company, phone, email, legal address and postal address. It also has older fields labelled KPP, OGRN, OKPO, and bank details. These labels refer to Russian identifiers and are not universally applicable to an overseas company. Ask support about fields that do not apply; do not invent equivalents.
Saving the record and submitting the company for verification are separate actions. Ordinary saving requires the mandatory fields. Verification has additional requirements described below.
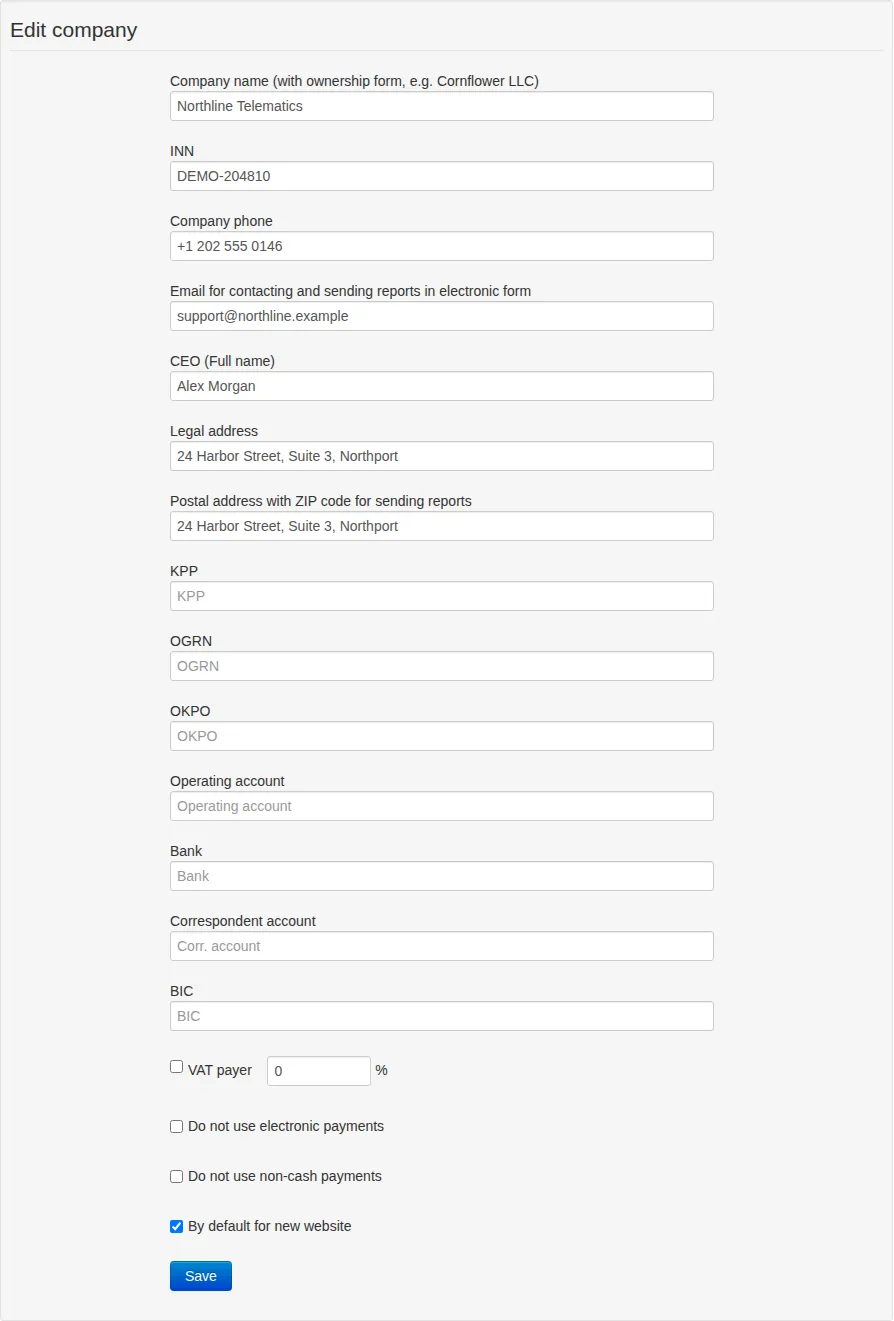
The main company form. Additional registration and bank fields are left empty in this demonstration.
An individual's form is shorter: full name, INN, email, phone and postal address.
Click Save at the bottom of the main form. This button does not save edits in the separate contacts block alongside it.
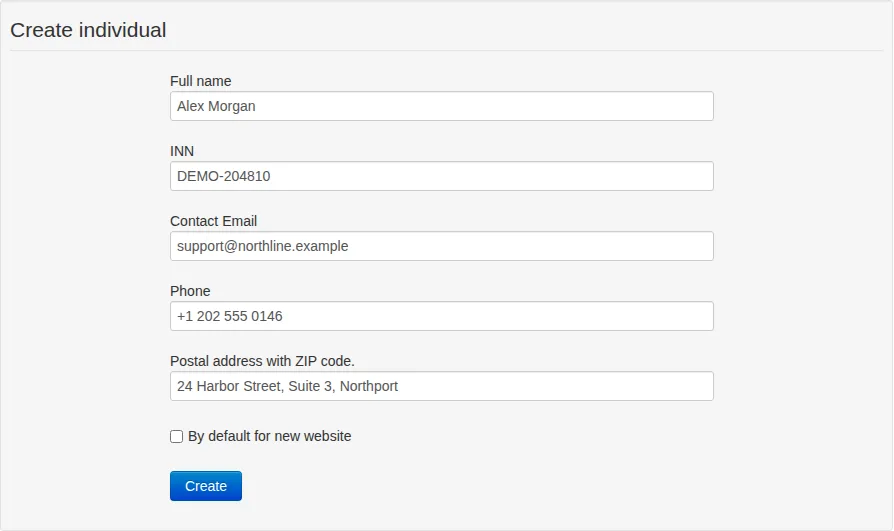
The alternative form for an individual. This is an example, not a second required provider.
Default provider and assignments
Choose Action → Set as default company in the list. You can also use By default for new website in the record. The first provider you create becomes the default automatically.
Default means preselected when creating a new website, not a bulk reassignment of all customers. To choose a different default, select another provider. Simply clearing the checkbox on the current default is not enough.
An existing website has its own provider selection in its settings. A user also has a provider assignment. Changing the default does not automatically move existing websites or accounts to that provider.
VAT and payment restrictions
The company form has a VAT payer checkbox and a rate field. Enter the company's actual details; selecting the checkbox does not register a tax status.
Two other checkboxes are restrictions, not enable switches:
- Do not use electronic payments restricts electronic top-up methods for this provider. On a hosted site it also prevents redemption of paid gift certificates.
- Do not use non-cash payments disables the corresponding invoice payment option.
To permit a method, leave its restriction unchecked. This alone does not connect a payment provider: availability also depends on currency, company verification and the particular hosting configuration. Check the customer's top-up page with a test account after making changes.
The company's bank fields are not your payout details for income from the platform. Payout details are configured separately in Finance.
Contact details for customers
In an existing provider's record, find the separate For "Contacts" section block. You can enter a customer-facing service name, office phone and address, opening hours, and sales, support and accounts contacts.
Our example uses Northline Telematics as the provider name and Northline GPS as the customer-facing service name. These names may differ.
The contacts block has its own Save button at the bottom. Complete and save one form before editing the other: navigating after a save can lose unsaved input in the adjacent form.
If separate basic contacts are left empty, the customer page may use the provider record's name, phone, addresses and email instead. Clearing an additional field therefore does not necessarily hide that information from customers.
After saving, open Contacts on the customer website, using a test user, and check the result. This is especially important when you have several providers. If a department you filled in is missing, send support the website address and provider name.
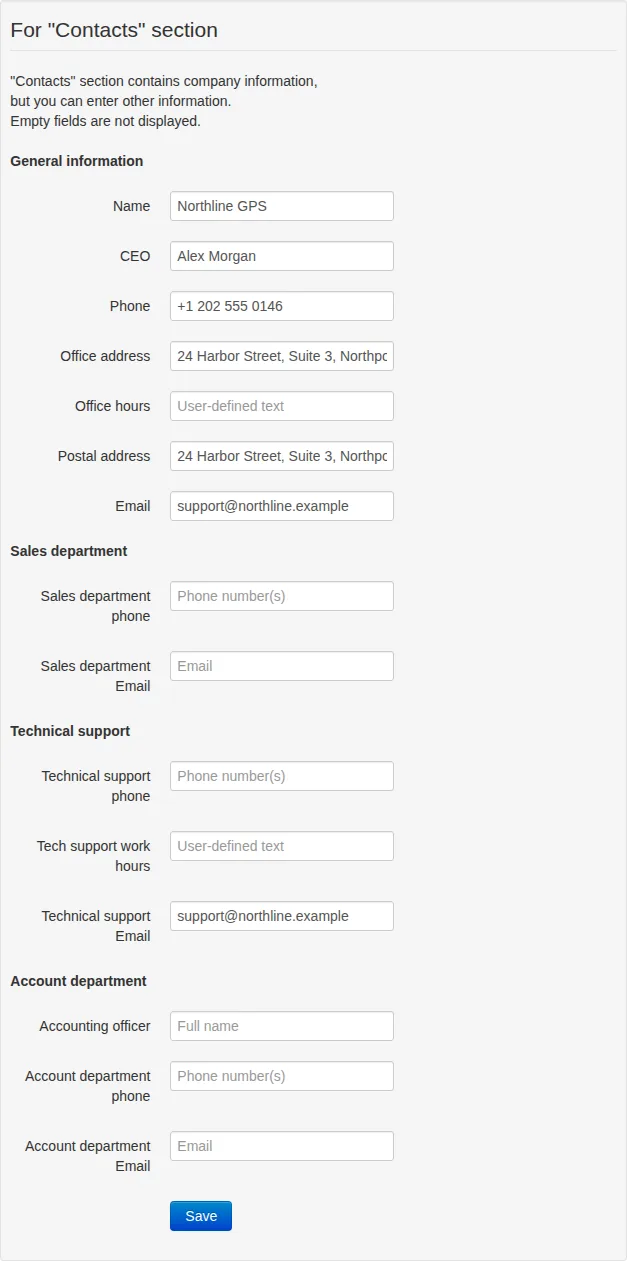
Customer-facing contacts are saved separately from the company's details.
Documents and company verification
A company can be unverified, under verification, verified or rejected. A record appearing in the list does not mean verification is complete.
The record includes an Upload document block. Select a document type and file, add a comment if needed, and click Upload. PNG, JPG, DOC, DOCX and PDF are supported. Keep each file at or below 5 MB for a reliable upload.
Check Uploaded documents after each upload. Then click Submit for verification separately. The current panel requires the full set of company fields and at least two uploaded documents before submission. Uploading files alone does not submit the request.
If a request is rejected, read the comment, correct the details and submit again. Do not upload fabricated documents. For an overseas company or an inapplicable field, agree the procedure with support first: this older full form is built around Russian company details.
The individual form does not have the same company-verification block. Do not interpret that as confirmation that the individual's documents have been verified.
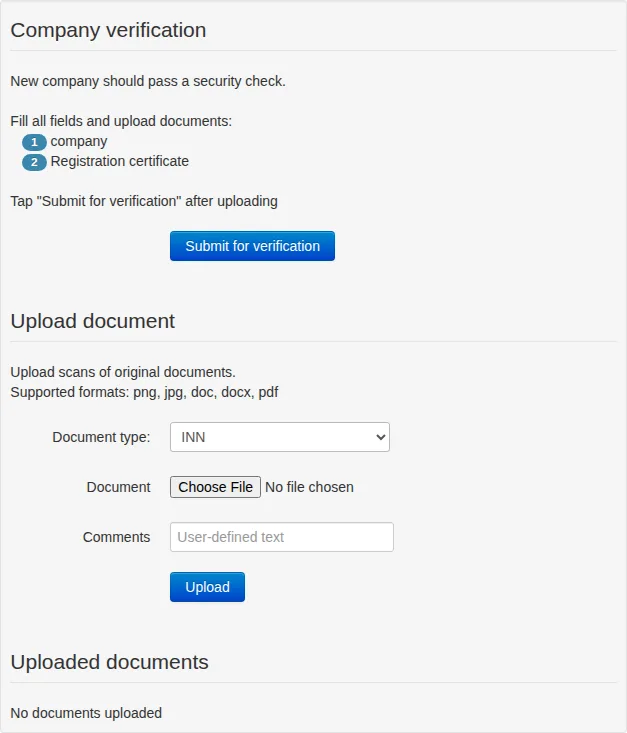
Uploading a document and submitting a verification request are separate actions. No demonstration documents were uploaded.
Delete a provider
Action → Delete asks for confirmation. A provider cannot be deleted while it is the default or is assigned to a website or user.
Do not reassign active customers merely to delete a record. If a provider is no longer used but is connected to settlements or documents, agree the next steps with support first.
Quick check
- The provider created by the wizard has not been duplicated.
- Valid details are saved and the default provider has been chosen deliberately.
- Contacts are saved with their own button and checked on the customer website.
- Payment restrictions are intentional; payout details are configured separately.
- Documents needed for verification have been submitted for review, not just uploaded.
Related articles
Administrator Guide: Contents
From your first website to everyday customer management: find the chapter you need to run your GPS tracking service.
Invoices and service documents
Check unpaid invoices, confirm receipts and review amounts for service documents. Distinguish calculation tables from issued documents and understand the legacy invoice template's limits.

Panel settings and access
Session lifetime, simultaneous logins, panel password and API key. Separate owner access from customer and website settings, and check the result after changing credentials.
Comments
Sign in to comment.
No comments yet.